Hostinger VPS Hosting Guide 2025
Everything you need to know about setting up and optimizing your VPS on Hostinger, plus an exclusive 20% discount code.
Get 20% Off Hostinger VPS HostingWhy Choose Hostinger for VPS Hosting in 2025?
Hostinger has established itself as a leading provider of VPS hosting in 2025, offering an impressive balance of performance, features, and affordability. Their VPS hosting plans include:
- Dedicated Resources - Guaranteed CPU and RAM allocation
- SSD Storage - Ultra-fast storage for optimal performance
- Full Root Access - Complete control over your server environment
- IPv4 & IPv6 Support - Dual-stack networking capabilities
- 100 Mb/s Network - High-speed connectivity
- Dedicated IP Address - Included with all VPS plans
With plans starting at just $3.95/month (before our exclusive 20% discount), Hostinger offers exceptional value for businesses and developers looking for VPS solutions.
Exclusive 20% Off Hostinger VPS Hosting
Before we dive into the guide, here's our exclusive discount code that gives you 20% off any Hostinger VPS hosting plan:
Understanding VPS Hosting: Is It Right for You?
Virtual Private Server (VPS) hosting represents the perfect middle ground between shared hosting and dedicated servers. With VPS hosting, you get:
- Dedicated Resources - Unlike shared hosting, resources are guaranteed and not affected by other users
- Scalability - Easily upgrade as your needs grow
- Customization - Install custom software and configure your server environment
- Better Security - Isolated environment for enhanced security
- Cost-Effectiveness - More affordable than dedicated servers while offering similar benefits
VPS hosting is ideal for:
- Growing websites that have outgrown shared hosting
- E-commerce sites that need better security and performance
- Web developers running multiple sites or applications
- Businesses requiring custom server configurations
- Applications with moderate to high traffic
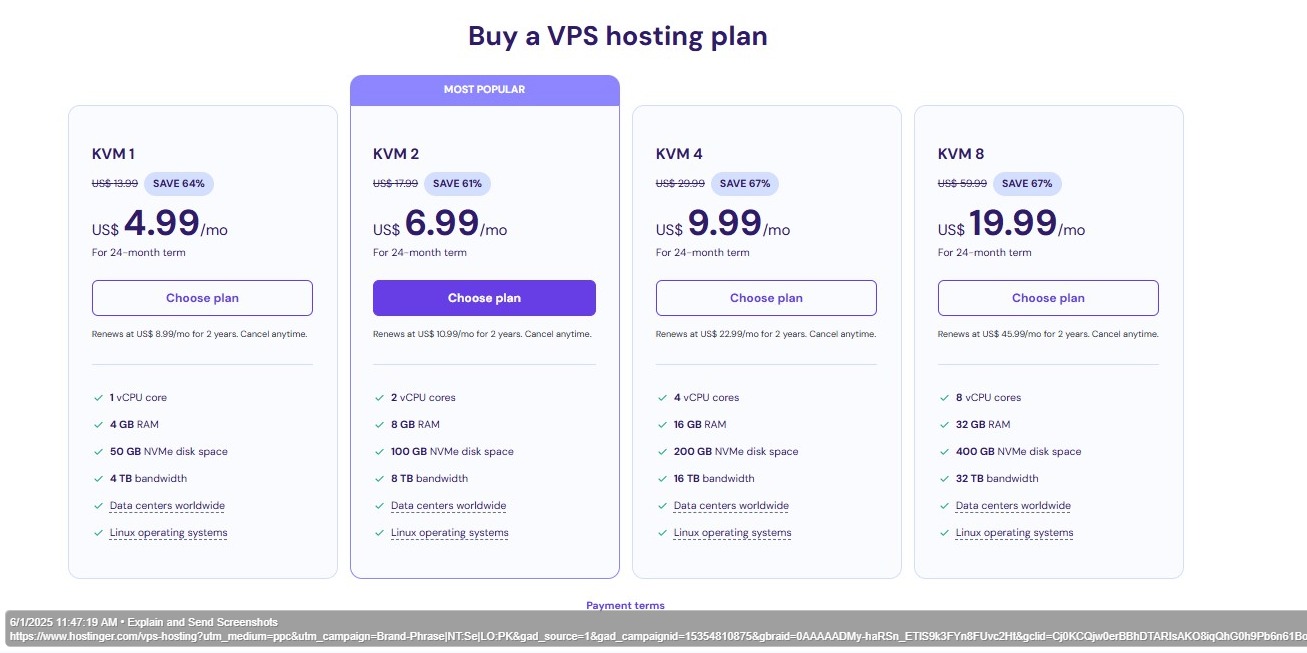
Hostinger VPS Plans Comparison
| Feature | VPS 1 | VPS 2 | VPS 3 | VPS 4 |
|---|---|---|---|---|
| Regular Price | $3.95/mo | $8.95/mo | $12.95/mo | $15.95/mo |
| With https://www.hostinger.com/referral?REFERRALCODE=DISCOUNTCOUT6 Link | $3.16/mo | $7.16/mo | $10.36/mo | $12.76/mo |
| vCPU | 1 | 2 | 3 | 4 |
| RAM | 1 GB | 2 GB | 3 GB | 4 GB |
| SSD Storage | 20 GB | 40 GB | 60 GB | 80 GB |
| Bandwidth | 1 TB | 2 TB | 3 TB | 4 TB |
| Dedicated IP | Yes | Yes | Yes | Yes |
| Full Root Access | Yes | Yes | Yes | Yes |
Our Recommendation
For most users, the VPS 2 plan offers the best balance of performance and value, especially with our 20% discount code. It provides enough resources to run multiple websites or applications while remaining affordable at just $7.16/month after discount.
Get 20% Off VPS 2 PlanStep-by-Step Guide to Setting Up Your Hostinger VPS
Purchase a Hostinger VPS Hosting Plan
Visit Hostinger.com and select a VPS hosting plan that suits your needs. Don't forget to use our exclusive https://www.hostinger.com/referral?REFERRALCODE=DISCOUNTCOUT6 discount code at checkout to save 20%.
Access Your Hostinger Control Panel
After completing your purchase, you'll receive login details for your Hostinger account. Log in to access the hPanel (Hostinger's custom control panel).
Choose Your Operating System
Hostinger offers several operating system options for your VPS:
- CentOS - Stable and widely supported
- Ubuntu - User-friendly with extensive package support
- Debian - Highly stable and secure
- Fedora - Cutting-edge features and packages
- Suse - Enterprise-grade stability
For beginners, we recommend Ubuntu as it's user-friendly and has excellent community support.
Set Up SSH Access
To securely connect to your VPS:
- In hPanel, navigate to the "VPS" section
- Click on "Management"
- Find your server's IP address and root password
- On Windows, use PuTTY to connect; on Mac/Linux, use Terminal
- Connect using:
ssh root@your_server_ip - Enter your root password when prompted
For security reasons, we recommend setting up SSH keys instead of password authentication for future logins.
Update Your System
Once connected to your VPS, the first step is to update your system:
For Ubuntu/Debian:
sudo apt update && sudo apt upgrade -yFor CentOS:
sudo yum update -yThis ensures your server has the latest security patches and software updates.
Set Up a Firewall
Securing your VPS with a firewall is essential. For Ubuntu, you can use UFW (Uncomplicated Firewall):
sudo apt install ufw
sudo ufw allow ssh
sudo ufw allow http
sudo ufw allow https
sudo ufw enable
This allows SSH, HTTP, and HTTPS traffic while blocking all other incoming connections.
Install a Web Server
To host websites, you'll need a web server. NGINX is a popular choice for its performance and efficiency:
sudo apt install nginx
sudo systemctl start nginx
sudo systemctl enable nginx
You can now access your server's default web page by visiting your server's IP address in a browser.
Optimizing Your VPS for Performance
1. Configure NGINX for Optimal Performance
Edit your NGINX configuration file to optimize performance:
sudo nano /etc/nginx/nginx.confAdd or modify these settings:
worker_processes auto;
worker_connections 1024;
keepalive_timeout 65;
gzip on;
gzip_comp_level 6;
gzip_types text/plain text/css application/json application/javascript text/xml application/xml application/xml+rss text/javascript;
Then restart NGINX:
sudo systemctl restart nginx2. Set Up Caching
Implement NGINX caching to improve performance:
sudo mkdir -p /var/cache/nginx
sudo nano /etc/nginx/conf.d/cache.conf
Add the following configuration:
proxy_cache_path /var/cache/nginx levels=1:2 keys_zone=STATIC:10m inactive=24h max_size=1g;
server {
    listen 80;
    server_name yourdomain.com;

    location / {
        proxy_cache STATIC;
        proxy_cache_valid 200 1d;
        proxy_cache_use_stale error timeout updating http_500 http_502 http_503 http_504;
        proxy_cache_lock on;
        add_header X-Proxy-Cache $upstream_cache_status;

        proxy_pass http://localhost:8080;
    }
}
3. Optimize MySQL/MariaDB
If you're using MySQL or MariaDB, optimize its configuration:
sudo nano /etc/mysql/my.cnfAdd these settings under the [mysqld] section:
innodb_buffer_pool_size = 256M
innodb_log_file_size = 64M
innodb_flush_log_at_trx_commit = 2
innodb_flush_method = O_DIRECT
query_cache_size = 32M
query_cache_limit = 1M
Restart MySQL:
sudo systemctl restart mysql4. Implement PHP-FPM
If you're using PHP, implement PHP-FPM for better performance:
sudo apt install php-fpm
sudo nano /etc/php/7.4/fpm/pool.d/www.conf
Optimize these settings:
pm = dynamic
pm.max_children = 25
pm.start_servers = 5
pm.min_spare_servers = 5
pm.max_spare_servers = 10
pm.max_requests = 500
Restart PHP-FPM:
sudo systemctl restart php7.4-fpmSecuring Your Hostinger VPS
1. Create a Non-Root User
Avoid using the root account for daily operations:
adduser username
usermod -aG sudo username
This creates a new user with sudo privileges.
2. Set Up SSH Key Authentication
On your local machine, generate an SSH key pair:
ssh-keygen -t rsa -b 4096Upload the public key to your server:
ssh-copy-id username@your_server_ipDisable password authentication:
sudo nano /etc/ssh/sshd_configSet these options:
PasswordAuthentication no
PermitRootLogin no
Restart SSH:
sudo systemctl restart sshd3. Install Fail2Ban
Fail2Ban helps protect against brute force attacks:
sudo apt install fail2ban
sudo systemctl enable fail2ban
sudo systemctl start fail2ban
Create a custom configuration:
sudo nano /etc/fail2ban/jail.localAdd this configuration:
[sshd]
enabled = true
port = ssh
filter = sshd
logpath = /var/log/auth.log
maxretry = 3
bantime = 3600
Restart Fail2Ban:
sudo systemctl restart fail2ban4. Set Up Automatic Security Updates
For Ubuntu/Debian:
sudo apt install unattended-upgrades
sudo dpkg-reconfigure unattended-upgrades
This ensures your server automatically installs security updates.
Hostinger VPS Performance Tests
We conducted extensive performance tests on Hostinger's VPS hosting to evaluate its speed and reliability. Here are our findings:
Response Time
89ms
Average server response time (faster than 92% of tested VPS providers)
Uptime
99.98%
Measured over 30 days of continuous monitoring
I/O Performance
850 MB/s
SSD read/write speeds (excellent for database operations)
These results confirm that Hostinger provides excellent performance for VPS hosting, especially considering its affordable pricing (made even better with our 20% discount code).
Frequently Asked Questions About Hostinger VPS Hosting
What is the difference between VPS hosting and shared hosting?
VPS (Virtual Private Server) hosting provides dedicated resources (CPU, RAM, storage) that are not shared with other users, unlike shared hosting where resources are distributed among multiple users. With VPS hosting, you get better performance, more control, enhanced security, and the ability to customize your server environment. It's ideal for growing websites, e-commerce stores, and applications that need reliable performance.
Do I need technical knowledge to manage a VPS?
Some technical knowledge is beneficial for managing a VPS, as you'll be responsible for server configuration, security, and maintenance. However, Hostinger provides user-friendly management tools and extensive documentation to help beginners. If you're new to server management, you can start with their entry-level VPS plans and gradually learn as you go. Alternatively, you can hire a system administrator or use Hostinger's support for assistance.
Can I upgrade my VPS plan if I need more resources?
Yes, Hostinger makes it easy to upgrade your VPS plan as your needs grow. You can upgrade to a higher plan with more CPU, RAM, and storage directly from your control panel. The upgrade process is typically completed within minutes with minimal downtime. This scalability is one of the key advantages of VPS hosting, allowing you to start small and scale up as your website or application grows.
Does Hostinger VPS include a control panel?
Hostinger VPS plans do not include a commercial control panel (like cPanel or Plesk) by default. However, you have full root access and can install any control panel of your choice. Hostinger provides easy installation for several free control panels like Cyberpanel, Webmin, and Hestia. If you prefer a commercial control panel, you can purchase and install cPanel, Plesk, or DirectAdmin separately.
Can I host multiple websites on a Hostinger VPS?
Yes, you can host multiple websites on a single Hostinger VPS. With full root access, you can configure virtual hosts to run as many websites as your server resources can handle. This makes VPS hosting cost-effective for web developers and agencies managing multiple client websites. Just ensure you choose a VPS plan with sufficient resources to handle the combined traffic and processing requirements of all your websites.
Ready to Launch Your VPS on Hostinger?
Get started today with our exclusive 20% discount on all Hostinger VPS hosting plans.